
The “no” from your yoga teacher isn’t a rejection of your ability, but a necessary shift in focus from intensity to integrity to protect your changing body.
- Your practice must now prioritize creating space and stability over achieving deep poses, due to hormonal changes and the physical presence of your growing baby.
- Key modifications, like avoiding deep twists and lying on your back, are based on crucial physiological reasons like protecting the placenta and ensuring optimal blood flow.
Recommendation: Seek a Registered Prenatal Yoga Teacher (RPYT) who can guide you through these changes, empowering you with a practice that truly supports your pregnancy journey.
You step onto your mat, ready for the familiar flow, only to hear your trusted yoga teacher gently say, “I’m so sorry, I can’t teach you in my regular class anymore.” For a dedicated practitioner, these words can feel confusing, frustrating, and even a little alienating. You feel strong, you know your body, so why the sudden stop sign? It’s a common experience that leaves many pregnant students wondering if they’ve been relegated to a “lesser” form of yoga.
The standard advice to “listen to your body” or “just avoid twists” often feels vague and unsatisfying. It fails to explain the profound anatomical and physiological shifts happening within you. The truth is, your body is performing the incredible work of growing a new life, and your yoga practice must evolve to honour and support this process. It’s not about restriction; it’s about a fundamental shift in intention. The goal is no longer to push your limits but to create space, build stability, and cultivate a deep connection with your baby.
But if the real key isn’t just avoiding a few poses, what is it? The answer lies in understanding the *why* behind the modifications. This isn’t about losing your practice; it’s about transforming it into its most powerful form yet: a tool for a healthy, empowered pregnancy and a prepared birth. Your teacher’s hesitation is an act of care, an acknowledgement that your needs now require specialized knowledge that goes far beyond a standard yoga teacher training.
This guide will demystify the changes your practice needs. We will explore the specific risks of common poses, detail how to adapt your practice for each trimester, and empower you to find a truly qualified teacher. We will also cover breathing techniques for labour, managing discomfort, and even how to safely return to your mat postpartum or after an injury. Your yoga journey isn’t over; it’s just beginning a beautiful new chapter.
To help you navigate this transition with confidence, this article breaks down the essential knowledge you need. The following sections provide a clear roadmap for a safe and empowering prenatal yoga practice.
Summary: Your Guide to a Safe and Empowering Prenatal Yoga Practice
- What Makes Deep Twists Risky During Pregnancy When They Felt Fine Before?
- How Should Your Yoga Practice Change Between First, Second and Third Trimesters?
- How Do You Find a Genuinely Qualified Prenatal Yoga Teacher Near You?
- Which Breathing Practices Are Safe and Beneficial for Labour Preparation?
- How to Keep Practicing When Nausea, Fatigue or Back Pain Make Movement Hard?
- When Is It Safe to Progress Beyond Basic Core Exercises After a C-Section?
- Yoga Modification or Physio: Which Should Come First After a Back Injury?
- How to Safely Return to Yoga 6 Weeks After a Hamstring Strain?
What Makes Deep Twists Risky During Pregnancy When They Felt Fine Before?
Before pregnancy, a deep twist like Parivrtta Trikonasana (Revolved Triangle Pose) might have felt invigorating, a way to “detox” and release spinal tension. Now, that same movement carries risks that are invisible but significant. The primary concern is not your spine, but what lies in front of it: your growing uterus and the life-support system within it. A closed, deep twist involves compressing your torso, which can directly squeeze the uterus. This increases intra-abdominal pressure and, more critically, can potentially compromise the placenta.
While rare, a condition called placental abruption—where the placenta detaches from the uterine wall—is a serious medical emergency. Though it occurs in approximately 1% of all pregnancies, any activity that places direct, compressive force on the uterus should be avoided as a precaution. This is the core reason why your teacher is cautious. Their guidance is rooted in the principle of “do no harm” to both you and your baby.

This doesn’t mean all rotation is forbidden. The key is the difference between a “closed” twist (twisting toward your front leg) and an “open” twist (twisting away from it). Open twists, performed gently, create space across the chest and upper back without compressing the abdomen. As shown in the image, the focus shifts from wringing out the core to broadening the shoulders. In the first trimester, gentle open twists are generally acceptable. However, as your uterus grows, it’s wisest to replace all twisting motions with movements that promote length and space, such as side-body stretches.
Understanding this anatomical reality transforms a frustrating “rule” into an informed, loving choice to protect your baby. It’s the first step in shifting your practice from one of achievement to one of nurturing.
How Should Your Yoga Practice Change Between First, Second and Third Trimesters?
Pregnancy is not a single, static state; it’s a dynamic process divided into three distinct trimesters, each with its own energy, physical changes, and needs. A truly supportive prenatal yoga practice reflects this evolution, adapting month by month. It’s not about a blanket set of restrictions but a responsive and intelligent progression that honors where you are in your journey. Your practice in week 10 will, and should, feel very different from your practice in week 35.
In the first trimester, you may be dealing with fatigue and nausea, even though your bump isn’t showing. The theme here is grounding and acceptance. Your practice can remain quite similar to your pre-pregnancy routine, but with a heightened awareness. It’s the time to remove deep twists and intense core work, replacing them with restorative poses and gentle breathing to manage symptoms. The focus is on conserving energy and honouring your body’s need for rest.
The second trimester is often called the “honeymoon” phase, as energy returns and nausea subsides. Now, the theme shifts to building and empowering. This is the ideal time to incorporate strength-building poses, like supported warrior variations and squats, to prepare the body for the demands of labour. Hip-opening sequences become central, and the use of props, like a block between the thighs, helps maintain pelvic stability. A critical change occurs here: after 16-20 weeks, you must avoid lying flat on your back, as the weight of the uterus can compress the vena cava, a major vein, reducing blood flow to you and the baby.
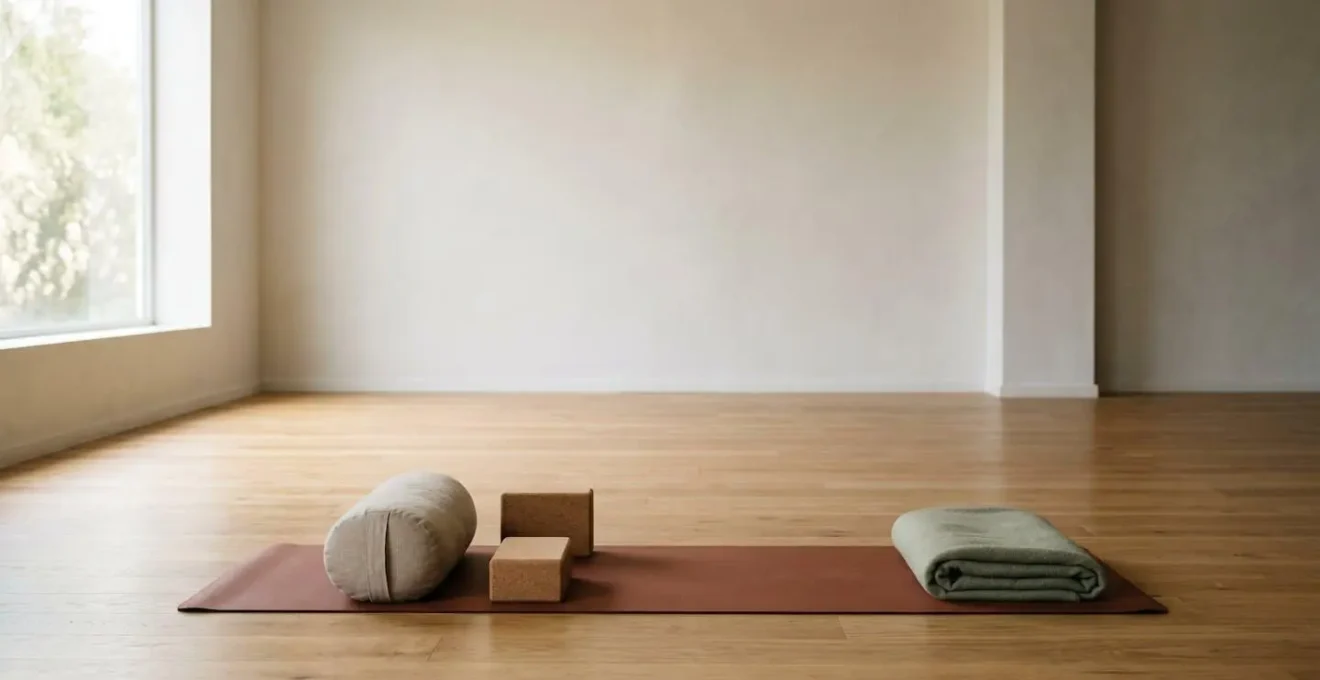
By the third trimester, the theme is creating space and surrender. Your growing belly changes your centre of gravity, so widening your stance in all standing poses is essential for stability. Props are no longer optional; they are your best friends, providing support and allowing you to find comfort in poses. The focus moves to side-body opening to make room for your lungs, pelvic floor relaxation in preparation for birth, and practicing Savasana (Final Relaxation) on your side, supported by bolsters and blankets.
By tailoring your movement to each stage, your practice becomes a powerful dialogue with your body, providing exactly what you and your baby need, right when you need it.
How Do You Find a Genuinely Qualified Prenatal Yoga Teacher Near You?
When your regular teacher wisely suggests you seek specialized instruction, the next question is: what does “qualified” actually mean? In the world of yoga, titles can be confusing. The key credential to look for is RPYT, which stands for Registered Prenatal Yoga Teacher. This is not just a weekend workshop certificate; it signifies a significant and specific level of training recognized by organizations like Yoga Alliance.
A standard 200-hour yoga teacher training (RYT-200) provides a wonderful foundation in general yoga philosophy and anatomy, but it typically includes very little, if any, information on pregnancy. The curriculum for an RPYT is entirely different. To earn this credential, a teacher must first be an RYT-200 and then complete an additional 85 hours of specialized prenatal yoga training from a registered school. This intensive program covers crucial topics that are absent from standard training: the anatomy and physiology of pregnancy, trimester-specific contraindications, modifications for common discomforts, breathing techniques for labour, and postpartum recovery essentials.
An RPYT is trained to understand the difference between a low-risk and high-risk pregnancy and knows when a situation is outside their scope of practice, requiring a referral to a healthcare professional like a midwife or physiotherapist. They don’t just offer a “gentle” class; they provide a practice that is therapeutically designed to support the pregnant body. They understand the mechanics of the pelvic floor, the effects of the hormone relaxin on your joints, and how to create a practice that is both safe and deeply empowering.
Action Plan: Vetting Your Prenatal Yoga Teacher
- Check Credentials: Ask directly if they hold an RPYT (Registered Prenatal Yoga Teacher) certification. Look for the “85-hour” training minimum as a key indicator of in-depth study.
- Inquire About Experience: Ask how long they have been specifically teaching prenatal yoga. An experienced teacher will have worked with a wide range of bodies and pregnancy experiences.
- Observe Their Language: During a trial class or conversation, notice their cues. Are they focused on creating space, stability, and pelvic floor awareness, or are they simply offering a “gentle” flow?
- Assess Prop Usage: A knowledgeable prenatal teacher will actively encourage and demonstrate the use of props (bolsters, blocks, blankets) to provide support and ensure proper alignment for the pregnant body.
- Confirm a Safety-First Approach: Ask them about their approach to contraindicated poses like deep twists or lying supine. Their answer should be clear, confident, and rooted in anatomical reasoning.
Investing the time to find a teacher with this specialized expertise is an investment in your well-being and a safe, joyful pregnancy journey. It ensures you are in hands that are not only welcoming but truly knowledgeable.
Which Breathing Practices Are Safe and Beneficial for Labour Preparation?
In yoga, breath is life force, or *prana*. During pregnancy, your relationship with your breath takes on a new, profound dimension. It becomes a direct line of communication with your baby and one of the most powerful tools you can cultivate for labour and birth. However, not all yogic breathing techniques, or *pranayama*, are safe or appropriate during this time. The goal shifts from advanced breath control to simple, effective techniques for calming the nervous system and working with your body’s natural rhythms.
The most important safety rule is the complete avoidance of any breath retention (*kumbhaka*) and vigorous, rapid breathing practices. As prenatal yoga experts advise, this is a non-negotiable principle for safety.
During pregnancy, it is essential to avoid any kumbhakas or breath retention practices. Additionally, avoid any vigorous breathing techniques, such as kapalabhati or bhastrika.
– Online Yoga School, The Best Modifications for Prenatal Yoga & How to Teach Them
These practices can increase intra-abdominal pressure and over-stimulate the nervous system, which is counterproductive to the calm, grounded state you want to cultivate. Instead, the focus turns to pranayama that soothes, centers, and prepares you for the marathon of labour.
The following table outlines several highly beneficial breathing techniques, explaining their function and when they might be used during labour. This approach, as detailed by prenatal wellness advocates, allows you to build a toolkit of breathing strategies to call upon when you need them most.
| Breathing Technique | Primary Function | When to Use | How to Practice |
|---|---|---|---|
| Bhramari (Humming Bee Breath) | Calming the Nervous System | Early labor, moments of anxiety or overwhelm | Inhale through nose, exhale while humming gently; creates soothing vibration that dispels fear |
| Dirga Pranayama (3-Part Breath) | Endurance and Focus | Throughout labor for sustained energy | Breathe deeply into belly, ribs, then chest; exhale in reverse order; increases oxygen flow to mother and baby |
| Deep Abdominal Breathing | Working with Contractions | Active labor during contractions | Slow inhale through nose for 4 counts, longer exhale through mouth for 6 counts; activates parasympathetic nervous system |
| Nadi Shodhana (Alternate Nostril) | Balancing Solar and Lunar Energy | During pregnancy preparation, early labor | Alternate breathing between nostrils to balance nervous system and promote relaxation |
By practicing these simple yet powerful techniques regularly, you are not just exercising your lungs; you are hardwiring your body’s response to stress, building resilience, and preparing your mind for a calm and centered birth experience.
How to Keep Practicing When Nausea, Fatigue or Back Pain Make Movement Hard?
There will be days during your pregnancy when the idea of a full hour on the mat feels impossible. Overwhelming fatigue, waves of nausea, or the persistent ache of back pain can make you want to abandon your practice altogether. This is precisely when the prenatal yoga mindset of “less is more” becomes your greatest asset. The goal isn’t to push through but to adapt with compassion, using “micro-practices” to find relief and connection, even for just five minutes.
Your yoga mat and props can become a sanctuary for restorative care. Instead of forcing a flow, you can choose a single pose or movement specifically designed to counter your symptoms. When you’re feeling exhausted, a 20-minute guided Yoga Nidra (yogic sleep), practiced while lying on your side supported by bolsters, can be more rejuvenating than a nap. For the common ache in the lower back, a few rounds of Cat-Cow on hands and knees can provide immense relief by gently mobilizing the spine and releasing tension.
The key is to have a toolkit of simple, effective movements you can turn to. Here are some highly recommended micro-practices tailored to specific pregnancy discomforts:
- For Nausea: Try a modified Legs-Up-the-Wall pose. In later pregnancy, this can be adapted to a ‘single leg drain’ to avoid lying flat while still promoting circulation. Gentle ankle circles can also help soothe the system.
- For Sciatica: The seated figure-4 stretch (placing one ankle over the opposite knee while sitting elevated on a block or bolster) is a fantastic way to target the piriformis muscle without putting pressure on the spine.
- For General Discomfort: A wide-kneed Child’s Pose, fully supported with a bolster under your torso and a block under your forehead, is a universal reset button. It allows your nervous system to down-regulate and creates a feeling of being held and safe.
By embracing these small moments of movement and rest, you maintain the thread of your practice, honour your body’s needs, and affirm that showing up for yourself, in any capacity, is more than enough.
When Is It Safe to Progress Beyond Basic Core Exercises After a C-Section?
Recovering from a Caesarean section is a unique journey that requires patience, respect for the healing process, and a highly specific approach to rebuilding core strength. A C-section is major abdominal surgery, and the urge to “get your body back” with traditional core exercises like crunches or planks can be not only counterproductive but potentially harmful. The key is to progress in phases, starting with reconnecting, not contracting.
The immediate postpartum period (the first 6 weeks) is for rest and foundational healing. The only “core work” you should be doing is reconnecting to your deep core through breath. This involves practicing diaphragmatic or “360-degree” breathing, where you feel your rib cage expand in all directions (front, sides, and back) on the inhale, and gently recoil on the exhale. This practice, often done lying on your side, begins to gently re-engage the transverse abdominis (TVA)—your deepest core muscle—and the pelvic floor without placing any strain on your incision.
After you receive medical clearance from your doctor (typically around 6-12 weeks), you can begin Phase 2: Integration. This is still not the time for planks. Instead, you introduce gentle, controlled movements like heel slides, bent-knee fallouts, and pelvic tilts. The goal is to teach your deep core muscles to work in coordination again. Before progressing further, it’s crucial to be assessed for Diastasis Recti (DR), the natural separation of the abdominal muscles that occurs during pregnancy. A pelvic floor physiotherapist is the best professional for this assessment.
Only after 12 weeks, and once your DR is confirmed to be functional and healing well, can you consider entering Phase 3: Loading. This is where you might introduce modified planks from your knees or side planks with your bottom knee down. Rushing into full planks or crunches before your deep core and connective tissue have healed can worsen DR and lead to instability or injury. The focus must always start from the inside out, rebuilding the deep, stabilizing muscles first. This phased progression is a non-negotiable part of a safe recovery.
By following this intelligent, patient approach as outlined by postpartum specialists at facilities like Transitions Yoga, you are not just healing your incision; you are rebuilding a strong, integrated, and resilient core that will support you for years to come.
Yoga Modification or Physio: Which Should Come First After a Back Injury?
Experiencing a back injury, whether during pregnancy or at any other time, can bring your movement practice to a screeching halt. The path back to the mat is often confusing, with many wondering whether to turn to a physiotherapist or a knowledgeable yoga teacher. The most effective approach isn’t a matter of “either/or,” but “both/and.” Physiotherapy and yoga serve complementary and sequential roles in a successful recovery.
Physiotherapy should always come first. A physiotherapist is a medical professional trained to diagnose the specific nature of your injury. They can identify the exact tissues involved (muscle, disc, ligament, or nerve) and provide acute care to reduce inflammation and pain. This is the critical rehabilitation phase, where you establish foundational healing and are given specific exercises to stabilize the injured area. Trying to “stretch it out” in a yoga class without a proper diagnosis can easily exacerbate the problem.
Once your physiotherapist has cleared you for more general movement, yoga becomes the ideal integration phase. This is where you move from rehabilitating an injury to reclaiming your body as a whole. A skilled yoga teacher can help you address the compensatory movement patterns you likely developed while injured—for example, over-relying on one side of your body. Yoga helps retrain your proprioception (your brain’s sense of where your body is in space), improves neuromuscular control, and uses breath as a tool to manage any residual discomfort.
The Collaborative Care Model for Injury Recovery
A comprehensive approach to post-injury recovery demonstrates that physiotherapy and yoga serve complementary rather than competing roles. Physiotherapy provides the initial diagnosis and rehabilitation phase, addressing acute injury and establishing foundational healing. Once cleared by a physiotherapist, yoga becomes the integration phase, helping patients re-learn proprioception (body awareness), address compensatory movement patterns developed during injury, and use breath to manage residual pain and retrain the nervous system. The most effective outcomes occur when patients act as bridges between practitioners, requesting a specific list of ‘contraindicated movements’ and ‘encouraged movements’ from their physio to share with their yoga teacher, ensuring safe and informed practice.
By viewing your physiotherapist as your diagnostician and your yoga teacher as your integration specialist, you create a powerful team that supports a full and lasting recovery, bringing you back to your mat with more wisdom and body awareness than before.
Key Takeaways
- Your prenatal yoga practice is not a “lesser” version, but a specialized practice focused on creating space and stability for you and your baby.
- Critical modifications like avoiding deep twists and supine positions are based on physiological safety to protect the placenta and ensure optimal blood flow.
- Always seek a Registered Prenatal Yoga Teacher (RPYT) with a minimum of 85 hours of specialized training for safe and effective guidance.
How to Safely Return to Yoga 6 Weeks After a Hamstring Strain?
Returning to your yoga practice after an injury like a hamstring strain requires more than just waiting for the initial pain to subside. A safe return is a strategic process focused on rebuilding resilient strength, not just regaining flexibility. The common impulse is to aggressively stretch the tight muscle, but this can be counterproductive, especially in the early stages, and can even lead to re-injury. The key lies in a patient, prop-heavy approach that prioritizes controlled strengthening and mindful movement.
After about six weeks, once the acute phase has passed, the goal is to rebuild the muscle’s capacity, particularly its eccentric strength. This refers to the muscle’s ability to remain strong as it lengthens—for example, the controlled lowering from a standing forward fold into a chair pose. Static, passive stretching can further weaken a healing muscle if done too soon. Instead, the focus should be on active, supported movements that encourage blood flow and gently reintroduce load.
Props are your most valuable allies in this phase. Using yoga blocks under your hands in any forward-folding posture is non-negotiable. This simple modification reduces the load on the hamstrings, allowing you to maintain the shape of the pose and work on spinal alignment without over-stretching the injured tissue. As your strength returns over weeks or months, you can gradually lower the height of the blocks. Similarly, using a yoga strap in a reclined hamstring stretch (Supta Padangusthasana) gives you precise control over the intensity, ensuring you never push past a gentle “hello” into the sharp pain of re-injury.
A smart return-to-practice plan should include:
- Prop-Heavy Folds: Always use blocks under your hands in poses like Uttanasana (Standing Forward Fold) and Prasarita Padottanasana (Wide-Legged Forward Fold).
- Controlled Lengthening: Practice movements that build eccentric strength, like slow, mindful lowering into squats or chair pose.
- Strap-Supported Stretches: Use a strap for reclined stretches to prevent overstretching, always keeping a micro-bend in the knee of the injured leg.
- Whole-Body Awareness: Pay attention to and release any compensatory tension that may have built up in your lower back or opposite hip.
By approaching your recovery with patience and the right tools, you can come back to your practice stronger and with a deeper understanding of your body’s mechanics, turning a setback into a step forward in your yoga journey.
Frequently Asked Questions about Prenatal Yoga
What does RPYT certification actually mean?
RPYT stands for Registered Prenatal Yoga Teacher, a designation from Yoga Alliance. To qualify, a teacher must first hold a RYT-200 (or higher) credential and complete an 85-hour prenatal yoga training from a Registered Prenatal Yoga School (RPYS), plus teach 30 hours of prenatal yoga.
How is RPYT different from a regular 200-hour yoga teacher?
While a standard 200-hour YTT covers general yoga fundamentals, an RPYT certification requires an additional 85+ hours focused specifically on pregnancy anatomy, contraindications, trimester-specific modifications, labor preparation, and postpartum recovery – essential knowledge for safely teaching pregnant students.
Can I take prenatal yoga from a teacher without RPYT certification?
While registration with Yoga Alliance is not legally required to teach prenatal yoga, seeking an RPYT-certified teacher ensures they have met rigorous standards for prenatal-specific training, understand high-risk versus non-high-risk pregnancy, and know when to refer students to healthcare professionals.